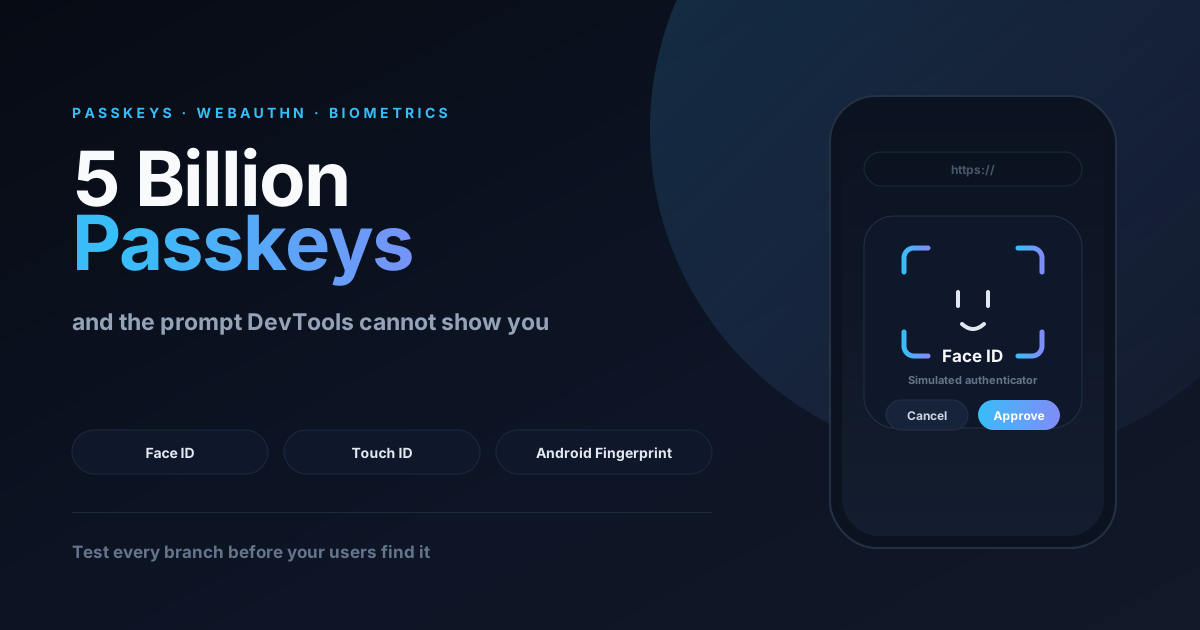
There are an estimated 5 billion passkeys in active use worldwide. Consumer awareness reached 90% this year, up from 75% in 2025, and 75% of people have enabled at least one. WebAuthn Level 3 became a W3C Recommendation on 25 August 2026. On paper, the industry finished the migration off passwords.
In practice, the numbers that matter most to a product team are the other ones. Nearly half of consumers have abandoned a purchase because they could not remember a password, and 57% of organisations still lean on passwords as the primary way employees sign in. Pixiv reported a 99% login success rate after moving to passkeys, a 29% improvement over passwords.
So the spec is done, the platform support is done, and the demand is there. What is not done is the last mile: a passkey login ends in a native biometric prompt on one specific device, and that prompt is the single hardest thing on the web to test.
1. Why WebAuthn is the hardest flow on the web to test
Most authentication is testable. You can curl a login endpoint, script a session cookie, replay a token. A passkey ceremony resists all of that, for six structural reasons.
It requires a secure context. navigator.credentials is unavailable unless the page is served over HTTPS, with localhost as the one exception browsers grant. The moment you point your phone at your laptop to test on real hardware, you are on http://192.168.1.24:3000, which is not a secure context, and the API your button depends on is simply absent. Nothing throws a helpful error. The button just does nothing.
The relying party ID is bound to a domain. A passkey registered for emuluxe.com is not usable from staging.emuluxe.com or from a preview URL. The rpID must be the registrable domain with no scheme and no port, while the origin must include the scheme. Get that pair wrong between environments and registration succeeds while authentication silently fails, because the credential is bound to a different origin than the one asking for it.
Conditional UI is invisible outside a real browser. The autofill style passkey suggestion only appears when an input carries autocomplete="webauthn" and the browser mediates the whole ceremony. It also holds an in flight credentials.get() open for the lifetime of the page. Start a registration while that call is pending and you can collide with your own ceremony. DevTools device mode does not render OS autofill, so this entire surface stays dark until a user reports it.
User activation is consumed by the first await. Biometric prompts require genuine user activation, meaning the call has to happen inside the gesture. Chain a create() behind an await fetch() that loads registration options and the activation is gone by the time the prompt should appear. On a desktop with a warm cache this often still works. On a phone with a slow network it does not.
Platform authenticator availability varies. PublicKeyCredential.isUserVerifyingPlatformAuthenticatorAvailable() returns false on a large set of real devices. Whatever fallback you wrote for that case is usually the least tested code you own, and it is the code that runs for the users most likely to churn.
You cannot automate the prompt. Puppeteer and CDP cannot approve a Face ID sheet. There is no headless path. That is why passkey flows end up on a manual QA checklist, which means they get tested on exactly one device, usually the developer's own laptop.
2. What actually differs between devices
The spec is uniform. The experience is not. These are the branches a passkey button has to survive.
| Device class | Prompt you get | Transport reported | Common failure |
|---|---|---|---|
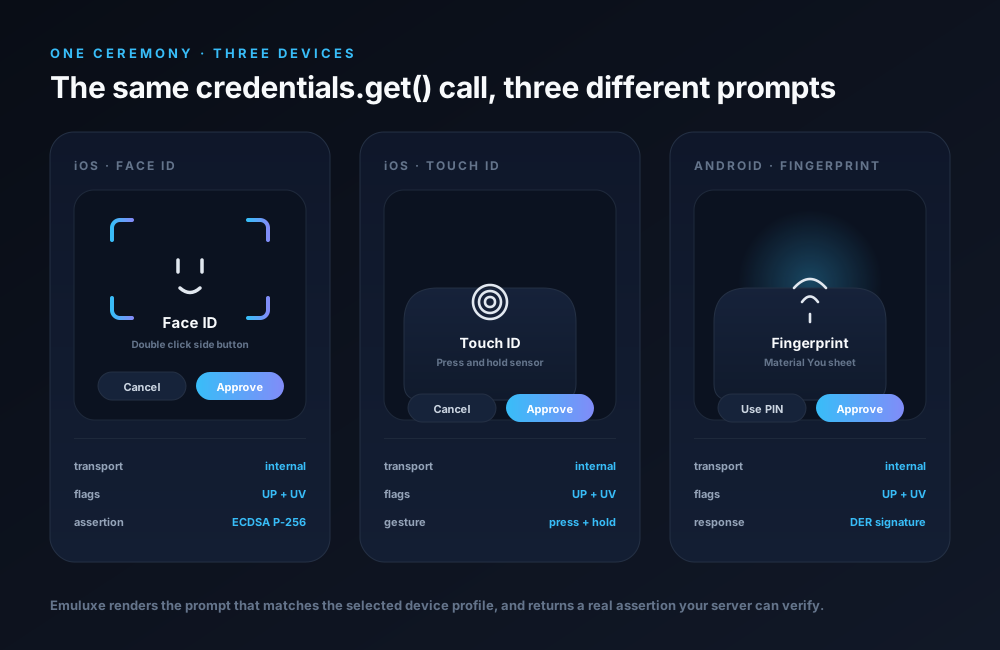
| iPhone with Face ID | Double click side button sheet | internal | Layout assumes a bottom sheet; the side button copy is never mentioned |
| iPhone or iPad with Touch ID | Bottom sheet with fingerprint ridges | internal | Press and hold gesture not documented anywhere in your UI |
| Android with fingerprint | Material You bottom sheet, sensor glow | internal | Under display sensor placement makes your Cancel button unreachable |
| Android with face unlock | Camera based sheet | internal | Slower and more failure prone; your retry loop has no timeout |
| Desktop platform authenticator | Windows Hello or Mac Touch ID | internal | Works, so it hides every mobile problem |
| Security key only | Browser security key dialog | usb, nfc | No internal transport, so an authenticatorAttachment: platform assumption breaks |
| No platform authenticator | Nothing, straight to your fallback | none | The fallback path was never run |
Two API details drive most of those rows. authenticatorAttachment tells you whether the user used a platform authenticator (platform) or a roaming one (cross-platform), and getTransports() returns what the credential can use, typically a mix of internal, hybrid, usb, nfc and ble. Hybrid is the cross device flow where a phone signs a login on a desktop. A UI that only accounts for internal will confuse every hybrid user, and hybrid is the fastest growing path precisely because it is how people log in on shared and borrowed machines.
3. How Emuluxe simulates biometrics, and why it is not a UI mock
Most biometric stubs return a hardcoded object and call it a day. That tests your prompt rendering and nothing else. The Emuluxe biometric engine does something more useful. It monkey-patches navigator.credentials.create and navigator.credentials.get and produces a response a real relying party server can verify.
The registration path generates a genuine ECDSA P-256 key pair with crypto.subtle, exports the public key as a COSE key, derives the rpIdHash with SHA-256, assembles the authenticator data buffer with the correct length layout, and stores the private key so a later assertion can be produced from the same credential.
The authentication path is where it earns its keep. It builds a 37 byte authenticator data block containing the rpIdHash, a flags byte, and a monotonically increasing sign count, hashes the client data, signs the concatenation, and converts the result from the 64 byte raw ECDSA form into DER, which is what verifiers actually expect. It returns authenticatorAttachment: 'platform' with getTransports() reporting internal and hybrid.
// The shape your server receives. This is a real assertion, not a stub.
{
  id: "…",                            // base64url credential id
  rawId: ArrayBuffer,
  response: {
    authenticatorData: ArrayBuffer,   // 37 bytes: rpIdHash + flags + signCount
    clientDataJSON: ArrayBuffer,      // type: "webauthn.get"
    signature: ArrayBuffer,           // DER encoded ECDSA P-256
    userHandle: ArrayBuffer | null,
    getTransports: () => ["internal", "hybrid"]
  },
  type: "public-key",
  authenticatorAttachment: "platform"
}
That matters because it moves your test boundary. You are not only checking that a prompt appears. You are checking that @simplewebauthn/server or your hand rolled verifier accepts the assertion, updates the counter, and issues a session. The cryptography is real, so the verification is real.
Three more behaviours worth knowing about, because they are what make the simulation behave like a device rather than a demo:
- Device accurate prompts. The engine reads which device profile you selected and renders the matching prompt: a Face ID sheet with animated corner brackets and a swipe up success animation, a Touch ID bottom sheet with fingerprint ridges and a press and hold interaction, or an Android Material You sheet with a sensor glow and a ripple. A Face ID device never shows a Touch ID prompt, so you cannot pass a review by accident.
- Cancellation is a first class outcome. Cancel a prompt and the engine throws
NotAllowedError, exactly as hardware does. Your catch block gets exercised instead of being written and forgotten. - Physical mode passes through. Switch to Physical and the engine steps aside and calls the browser's original WebAuthn implementation, so you can drop from simulation onto real host hardware and confirm the difference.
4. Turning it on
Biometrics live in the simulator's Device Features panel, alongside the other device capability controls.
- Open a simulation session in the platform for any device profile, for example an iPhone with Face ID or a Pixel with a fingerprint sensor.
- Expand Device Features and find the Biometrics section.
- Flip Enable Biometrics on. With it off, the engine rejects biometric requests immediately, which is a useful test in itself.
- Pick a mode in the segmented control: Simulated for the mock authenticator, or Physical to delegate to your host machine's real WebAuthn.
- Navigate your login page inside the frame and trigger a registration or sign in.
Because the control is a per device setting, switching from an iPhone profile with Face ID to a Pixel profile with a fingerprint sensor and running the same flow twice takes seconds. That comparison is usually what finds the bug.
5. The four flows worth testing
5.1 Registration
import { startRegistration } from '@simplewebauthn/browser';

const options = await (await fetch('/api/auth/passkey/register-options')).json();
const attestation = await startRegistration(options);
await fetch('/api/auth/passkey/register-verify', {
  method: 'POST',
  headers: { 'Content-Type': 'application/json' },
  body: JSON.stringify(attestation),
});
Verify that the prompt renders the right type for the selected device, that the credential is stored for the session, and above all that your verify endpoint accepts it. A registration that looks successful in the UI but fails server side verification, because of a malformed clientDataJSON or a stale challenge, is the most common passkey bug in the wild.
5.2 Authentication
import { startAuthentication } from '@simplewebauthn/browser';

const options = await (await fetch('/api/auth/passkey/login-options')).json();
const assertion = await startAuthentication(options);
const res = await fetch('/api/auth/passkey/login-verify', {
  method: 'POST',
  headers: { 'Content-Type': 'application/json' },
  body: JSON.stringify(assertion),
});
const { verified } = await res.json();
Assertions are stateful. The sign count has to increase, the challenge has to be the one the server issued, and the credential ID has to match the stored document key exactly. Run registration and then authentication in the same session so the stored credential is available, then repeat after a page refresh to confirm you understand that the mock credential store is session scoped.
5.3 Conditional UI
Add autocomplete="webauthn" to the username field and check that a live conditional ceremony does not break enrollment when the user chooses to register instead. This is the collision the engine handles by aborting the pending conditional call before it begins a registration. Test it by landing on the login page with a passkey already available and then clicking Register.
5.4 The fallback path
Switch to a device profile with no platform authenticator, or turn Biometrics off entirely, and confirm that your fallback is reachable, correct, and not a security downgrade. A passkey rollout that quietly falls back to a weak PIN, or to a password reset flow with no verification, is worse than not shipping passkeys at all.
6. A test matrix you can run today
| Scenario | Device profile | Biometric mode | Expected result |
|---|---|---|---|
| Face ID registration | iPhone with Face ID | Simulated | Face ID sheet, credential created, server verify passes |
| Fingerprint registration | Pixel with fingerprint | Simulated | Material You sheet, credential created, server verify passes |
| Touch ID authentication | iPhone or iPad with Touch ID | Simulated | Bottom sheet, counter increments, session issued |
| Wrong prompt type | Face ID device, expecting Touch ID | Simulated | Touch ID prompt never appears, which is correct |
| User cancels | Any | Simulated | NotAllowedError, your catch block runs, no session issued |
| No authenticator | Older device profile | Simulated | Fallback path renders and is secure |
| Simulation disabled | Any | Off | Request rejected immediately, no prompt, no credential |
| Real hardware check | Desktop with biometrics | Physical | Host WebAuthn prompt appears and completes |
7. What shipping passkeys on our own login taught us
Emuluxe's own sign in uses passkeys, verified server side with @simplewebauthn/server, so the failure modes in this section are ones we hit rather than read about.
Keep the browser's credential ID exactly as it is. Our first version stored the credential ID by wrapping the byte array in a Node Buffer and calling toString('base64url'), which re-encodes a string that was already base64url. The result is a document key that never matches what the browser sends back, so authentication failed for everyone who enrolled in that window. Store rawId as base64url, use it as the document key, and do not round trip it through a second encoder.
Make your lookup tolerant, and index it. Once a credential ID has been written in the wrong shape you cannot fix it retroactively, so the lookup needs to try the direct document first and fall back to a collection group query when that misses. A collection group index is mandatory for the fallback to work, and without it the query fails with a precondition error that users experience as "device not registered correctly".
Derive rpID and origin from one place. Read rpID as the host with the port stripped, and origin as scheme plus host, with https for everything that is not localhost. If those two values are computed in two different files, they will disagree in exactly one environment, and that environment will be production.
Treat the sign count as real state. Assertions increment the counter and the verifier compares it against the stored value. Persist the new counter on every successful authentication, and do not skip it because it is inconvenient in the happy path.
Always keep a recovery path. Passkeys sync across a user's own devices, but a lost or replaced device still needs a route back into the account. Email verification or an identity provider re-link is enough, and it is the difference between a locked out user and a support escalation.
8. Where this fits your workflow
- Platform simulation. The Device Features panel gives you the Biometrics control per device, so one session can move between an iPhone with Face ID, an iPad with Touch ID and an Android device with a fingerprint sensor.
- IDE extensions. The same device profiles and the same simulation session are available inside VS Code and Cursor, so you can stay in the editor while you iterate on the login flow.
- AI agents. The
@emuluxe/mcp-serverexposeslist_devicesandsimulate, so an agent can open a session on a Face ID device, capture frames and screenshots, and report what your layout did. Approving a biometric prompt in Simulated mode stays a deliberate human step, which is the correct boundary for an authentication flow. - What to keep manual. Do not try to put passkey verification into unattended CI today. The prompt needs a human. Automate the unit tests around your verifier, and keep the end to end ceremony as a short manual matrix on the device profiles above.
9. Troubleshooting
| Symptom | Likely cause | Fix |
|---|---|---|
| Button does nothing at all | Not a secure context, or navigator.credentials absent | Serve over HTTPS or test on localhost; never test WebAuthn from a LAN IP |
NotSupportedError | Browser lacks WebAuthn support, or the feature is switched off | Check browser support, ensure HTTPS, enable the simulation |
| Registration succeeds, authentication fails | Credential not stored, or stored in the wrong shape | Inspect the session credential store and confirm the credential ID matches the server's document key |
| Prompt appears as the wrong type | Device feature flags do not match the profile | Reselect the device profile and reload the simulation |
| Prompt never appears after a slow request | User activation consumed by an earlier await | Call the WebAuthn API directly inside the click handler |
NotAllowedError in Physical mode | Host machine has no platform authenticator | Switch to Simulated, or use a device with biometric hardware |
| Prompt renders but buttons do not respond | The rendering layer lost the click events | Reload the simulation and check the console |
10. Checklist
- Passkey login tested on a Face ID profile, a Touch ID profile and an Android fingerprint profile
- Registration verified end to end on the server, not just in the UI
- Authentication re-run in the same session, with the sign count confirmed as incrementing
- Cancel tested, and the
NotAllowedErrorpath handled with a clear message - Fallback tested on a device with no platform authenticator
- Biometrics disabled tested, and the request rejected cleanly
-
autocomplete="webauthn"present, and conditional UI checked against registration -
rpIDandoriginderived from one source, with production values confirmed - Account recovery path documented and reachable after a lost device
- Real hardware pass run in Physical mode before launch
Conclusion
Passkeys won. The remaining work is not standards work, it is verification work, and it lives in the last two seconds of the flow where a native prompt asks a human to confirm who they are.
That moment depends on a secure context, a correctly bound relying party ID, a surviving user activation, a platform authenticator that may or may not exist, and a prompt that renders differently on every device family your users own. None of it is visible from a desktop browser, which is why passkey regressions keep reaching production.
The fix is boring and effective. Make every branch reachable in simulation, including cancellation and the no authenticator case, and check your server side verifier against real assertions rather than a stub. Do that on three device profiles and you have covered ground that used to require a drawer full of phones.
Start here:
- Open a simulation session in the Emuluxe platform
- Get Emuluxe for VS Code & Cursor
- Connect an AI agent with the Emuluxe MCP server
- Read the Biometrics documentation
Related reading: